
Dahlias

Description
Towering beauties of the late summer garden, dahlias are a must grow for the home or cutting-garden!
| Height
|
3-5ft when full grown
|
| Spacing
|
12” between plants
|
| Light
|
Full sun or part shade
|
| Zone
|
Grows everywhere in the USA (annual in zones 2-6, tender perennial in zones 7-11)
|
| Shipping
|
Beginning mid-April, after your last frost
|
| Includes
|
5 full clumps of tubers, with planting instructions and wooden plant markers: Totally Tangerine, Polka, Crème de Cognac, Crème de Cassis, Café au Lait
|
| Botanical Name
|
Dahlia pinnata
|
Conditions
| Deer
|
Deer resistant
|
| Kids+Pets
|
Mildly toxic, can irritate skin; petals edible
|
| Water
|
Water regularly once it begins to grow
|
| Indoors+Pots
|
Grows well in containers outside
|
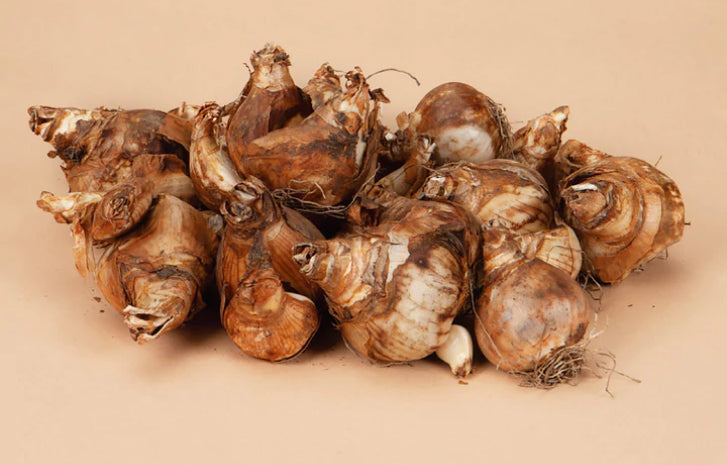
Receiving and Planting
Alright, let’s plant some dahlias, dah’ling! Dig a hole about 8-12" deep and mix in compost if you have it. For planting the clump whole, the tuber clump should be fully covered in dirt, but the stem should be sticking out, just even to the soil level. For planting a single tuber, (see below under Dividing), lay the tuber on its side horizontally 2-4” deep. Cover with soil and gently compress to make your dahlias nice and snug. Mark the spot with support (a stake or tomato trellis works well) for the big blooms to come. If planting multiple tubers or clumps, space them about 12-18” apart for a tight cluster, or 24” for taller varieties (over 4 feet) or if you plan to pinch them back to make them bushier (see below under Flowers and Foliage). Water the area after planting to settle the dirt around your tubers, then only water if the soil is very dry, otherwise leave it be until it starts to grow. If you want to start your dahlias indoors about a month before your last frost to get a head start, you can plant them in a 1-gallon pot and place them under a grow light or in a sunny windowsill. We recommend pots that drain well (don’t forget to put a dish underneath!) Put a layer of pebbles at the bottom of the pot to facilitate drainage. Keep the soil just slightly moist, and water them a bit more once they start to sprout. Carefully remove from the pot and plant as above once the spring weather settles in.
Sun, Soil, Water
With dahlias, the more sun the better, but if you live in a super hot climate, a little afternoon shade is good to keep from getting droopy and dried out. If your plant is in too much shade, it may get green and leafy, but not bloom. Dahlias prefer good soil, so mixing in compost when you plant is ideal. More importantly, the soil needs to drain well - don’t plant your dahlias in a place where they might stand in soggy dirt. You will need to water them regularly, but not as often as your summer annuals. Keep the soil evenly moist - stick your finger in the dirt a couple times a week to check the soil’s moisture until you get into a watering rhythm. If it's dry, water it. Easy. Water the whole plant, not just the soil, to prevent fungus and keep off bugs. Mulching your garden bed will help keep the moisture in and fight off weeds.
Flowers and Foliage
Dahlias are prolific bloomers, and the more you pick the flowers the more blooms you will get. Their vase life is relatively short, but they make up for it by producing an abundance of flowers. They’ll bloom from mid summer until frost, and they’re colors will change as the heat of the summer ramps up then wanes in the fall. The early blooms will start small on shorter stems, but the more you cut the flowers and as the season progresses, the flowers will get big and full and their individual stems will get longer. When the plant is about 12" tall you can pinch it back, (which is to clip off the first main middle bud), so that the plant is encouraged to be bushier, produce more large stems, and more blooms as it matures. (Make sure to plant your tubers with a little extra space if you plan to do this). Dahlias grow on tall stalks with big deep green serrated leaves. The leaves can cause a bit of irritation, so gloves are recommended when handling. In places with mild climates, generally zones 7-10, dahlias are tender perennials, but in places with freezing winters they are annuals. See below for more info on over-wintering your dahlias.
Problem Solving
Problem solving Fortunately, most fuzzy critters don’t care for dahlias, but they are popular with some bad bugs. A gentle, vegetable-safe, neem oil based spray works best. Be sure to avoid the flowers themselves, as we don’t want friendly pollinators to buzz off. Dahlia tubers are prone to rot, so only water when the soil is dry. Be sure to pull weeds around your plants so they aren’t competing for nutrients in the soil. Supporting your plants is key. The simplest method is with a wooden stake. We recommend a stake between 3-6 feet, depending on the height of your plant (check the product page!) Use a rubber mallet to drive the stake into the ground next to the stem of your clump, about 4-6 inches away so you don’t hit your tubers with it. Use anything you have handy to tie them gently to the stake - twine, hemp string, zip ties, etc. As your plants grow, you may need to add additional ties to increase support.
Over-Wintering In Place
Operation Easy - Leave Them There: In most regions dahlias are annuals, but if you live in *just* the right climate you can leave them in the ground and they’ll come back the next year. If you get cool winters but do not get long hard freezes (zones 7 and up or coastal regions), you can generally leave your dahlia tubers in place and they’ll come back happily next spring. Now, you are leaving them to the mercy of the increasingly-unpredictable elements with this plan, but it's the least work. Just cut the stalks and foliage down to the dirt, and then cover the area with a natural blanket about 4-6” deep to keep them cozy: mulch, compost, fall leaves, pine needles... the idea is just to insulate the ground above your dahlia tubers. If you have particularly rainy winters, we also recommend that you cover your dahlia patch with a tarp to prevent the bulbs from getting too wet and rotting. Some people outside of the mild and coastal zones for which this method is recommended can get lucky with a strange micro-climate, an unusually mild winter, or an especially cozy spot in the garden, and their dahlias will come back in the spring. If you give it a try and it works for you, let us know!
Digging
Operation Dig: Dahlia tubers multiply during the season, so if you want to dig them up and divide them you can quickly multiply your stash of tubers for subsequent seasons. First, get the right tool for the job. A big shovel or pitchfork is optimal. You’ll want to cut the stalks down, but leave 6-8 inches sticking out of the dirt - it will serve as a handle when you pull out the clumps. When digging out a clump, start into the dirt about a foot away from the stalk - and go gently, because it's easy to break a tuber if you get in close. Make a circle around the stalk loosening dirt, just digging your shovel in at about a 30 degree angle, about 10 inches deep or so to start, getting the clump loosened from the dirt nice and easy. Then, it's time to “feel it out” - literally. Get a hold of that stalk-handle and give it a little tug. If it still feels firmly planted, go back in with your shovel and loosen up more dirt, getting closer to the stalk and deeper below the clump this time. If it feels loose, go ahead and gently pull your clump out of the dirt. Just like magic - that single tuber you planted is now a whole little family of tubers! Each tuber that has eyes (hopefully some of them but probably not all of them) can make its own plant. You’ll notice a couple of sad looking dark floppy tubers (those are called the mother tubers, isn’t that rude??) and you can cut those off because they typically won’t grow healthy plants next year. Next, you want to divide and store your dahlia tubers (see below). You can either store them as-is and divide in the spring (it’s easier to see the growing eyes in the spring, but harder to cut the tubers), or you can clean and divide your dahlia tubers in the fall and then store them ready to plant (the tubers are easier to cut in the fall, but it can be hard to see the growing eyes).
Storing Option A: Store Dirty, Divide Later
You can leave the clumps dirty and whole, (leaving them dirty is actually key to "preserving" them through the winter), then store them as-is in a place like a garage or basement where it's cool but not going to get freezing. 40-50 degrees is optimal. You can store them in a bed of *slightly* damp sawdust, vermiculite, or peat moss in boxes or crates, using newspaper to pack them in snug. Just don’t use plastic, air-tight bins - they need to breathe a bit. You can either divide them up or plant them as-is again once the soil warms up again in the spring. The good news: if you leave the clumps as-is until spring, the eyes will become more pronounced, and even sprout a little, so it's much easier to identify them and therefore divide up the viable tubers. Bad news is, they’re harder to divide in the spring - so it’s a tradeoff. Come spring, unpack your friends and divide your dahlia tubers - instructions below!
Storing Option B: Divide Now, Store Clean
If you want to divide the tubers now, you'll want to skip down to Operation Divide below. Once you've divided your tubers, let them dry out overnight so their cuts harden off. You then can either store them in bins, with the tubers not touching each other, in a bed of *slightly* damp sawdust, vermiculite, or peat moss. Or you can wrap them individually in plastic cling wrap (more work intensive but space efficient). Store them someplace cool and dark like a basement or a cool garage (40-50 degrees is optimal) until the soil warms up in the spring.
Dividing
To divide your dahlia tubers, first clean the dahlia clumps off really well (hard spray with the hose will do it- prepare to get messy). Then using a really sharp tool, cut your clump in half, then quarters. You can stop here (you’ve quadrupled your dahlia inventory!) or you can keep going to divide down to the individual tuber level. Each tuber, in order to grow, needs two main things: an eye and a connection to the growing stalk. Eyes, like on potatoes, are tiny little round nubs that will produce a sprout. They’re located on the crown of the dahlia tuber right where it meets the center stalk. They’re tricky to identify at first, and can be nearly impossible to see in the fall - in the spring they are much easier to spot and often have even begun to grow. Secondly, you need to make sure that the neck attaching the tuber to the stalk is not broken during dividing (if it breaks the dahlia tuber won’t grow, toss it.) If you aren’t sure that you have both of these things you can always plant a couple of iffy tubers together to increase your chances of getting a healthy dahlia. Now, you’re ready to either store (if it’s fall) or plant (if it’s spring). Dahlias are complicated, but worth it. There’s a lot of detail here, but you don’t need to get it precisely right - your dahlias want to grow. We’re also here to help, reach out with any questions!
Description
Towering beauties of the late summer garden, dahlias are a must grow for the home or cutting-garden!
| Height
|
3-5ft when full grown
|
| Spacing
|
12” between plants
|
| Light
|
Full sun or part shade
|
| Zone
|
Grows everywhere in the USA (annual in zones 2-6, tender perennial in zones 7-11)
|
| Shipping
|
Beginning mid-April, after your last frost
|
| Includes
|
5 full clumps of tubers, with planting instructions and wooden plant markers: Totally Tangerine, Polka, Crème de Cognac, Crème de Cassis, Café au Lait
|
| Botanical Name
|
Dahlia pinnata
|
Conditions
| Deer
|
Deer resistant
|
| Kids+Pets
|
Mildly toxic, can irritate skin; petals edible
|
| Water
|
Water regularly once it begins to grow
|
| Indoors+Pots
|
Grows well in containers outside
|